4 VR Stories
We started this endeavour with the naive confidence of the known unknowns ("There are Known Knowns"). It is this seductive state of artistic excitement and cheerful cluelessness where the end justifies any amount of time, brainpower, and expense. We jumped in. Moreover, at the same time as we were crafting digitally we would often compare the learning that we were doing in VR with our well honed skills in textiles. Reflecting on the two practices helped us to problem-solve. In VR, we were beginners again with all the heartache and excitement that new learning brings. Textiles were a comfort to us and became a trope within the VR space of relaxation. Floating fabric and soothing sound helped us to feel more grounded in this strange and sometimes difficult to both create and navigate landscape.
4.1 Youtube Learning
YouTube has emerged as a site for informal learning—its tutorials, demos, and lectures largely operating outside of formal educational channels. The instructional videos that guided us through game engine development are part of a burgeoning online cache of learning resources on the platform, ranging from the overarching to the task-specific. On YouTube, the instructor is often not a professional educator, but more often a peer or amateur with skills-specific training. Self-described experts have risen to the top of the heap, commonly designated as such based on viewers’ assessment not on the merits of their content but on the quality of their voice, for instance, or the perception of their capability (Utz and Wolfers). Importantly, there is an obvious gender divide on the platform. Men are over-represented in content creation (Reif et al.), and no more prominently than in the fields of technology and gaming (Christine Linke et al.).
The video-based tutorial model of instruction provides a striking counterpoint to craft-based pedagogy in which learning is immersive and stems from a layered dialogue between hand, brain, and material (Boling). Learning tech skills over YouTube generally involves replicating a series of instructions to achieve a specific task or outcome. For us, roadblocks were abundant, resulting from our relative illiteracy with respect to specialized language and lack of familiarity with the software. We tried to troubleshoot problems through experimentation and seeking alternative online resources—a process referred to as “pedagogical syncretism”, in which video tutorials are just one part of a multi-faceted approach. Over time, the ongoing practice of working with the software and learning-by-doing became central to our syncretic learning. Here, digital approaches share more common ground with craft skills than not. We navigate the virtual environment through keyboard strokes, joysticks, and VR hand controllers that require the same manual dexterity as a sewing machine, serger, or steam iron—the honing of skills achieved through persistent practice and repetition.
4.2 Embracing errors
Being surrounded by constraints reinforced an intuitive approach to making. At times, we let ambiguity and intuition direct the project, so that we could organically grasp the not-intended, the not-planned; we had to make the most out of happy accidents and glitches. Legacy Russell, author of Glitch Feminism: A Manifesto, describes 'glitch' as “an active word, one that implies movement and change from the outset; this movement triggers errors” (Russel 29).
For example, debug lines are normally used for solving coding problems but we felt they had an interesting aesthetic quality that we liked and decided to keep them in our VR experience. Our programmer was dismayed. Where he saw functionality and perhaps even ugliness, we saw the digital nature of what we were doing writ large and expressed through these lines that have a poetic quality. Our programmer also taught us to embrace log errors as they are a necessary part of the programming process—even a kind of badge of honour.
4.3 Scale
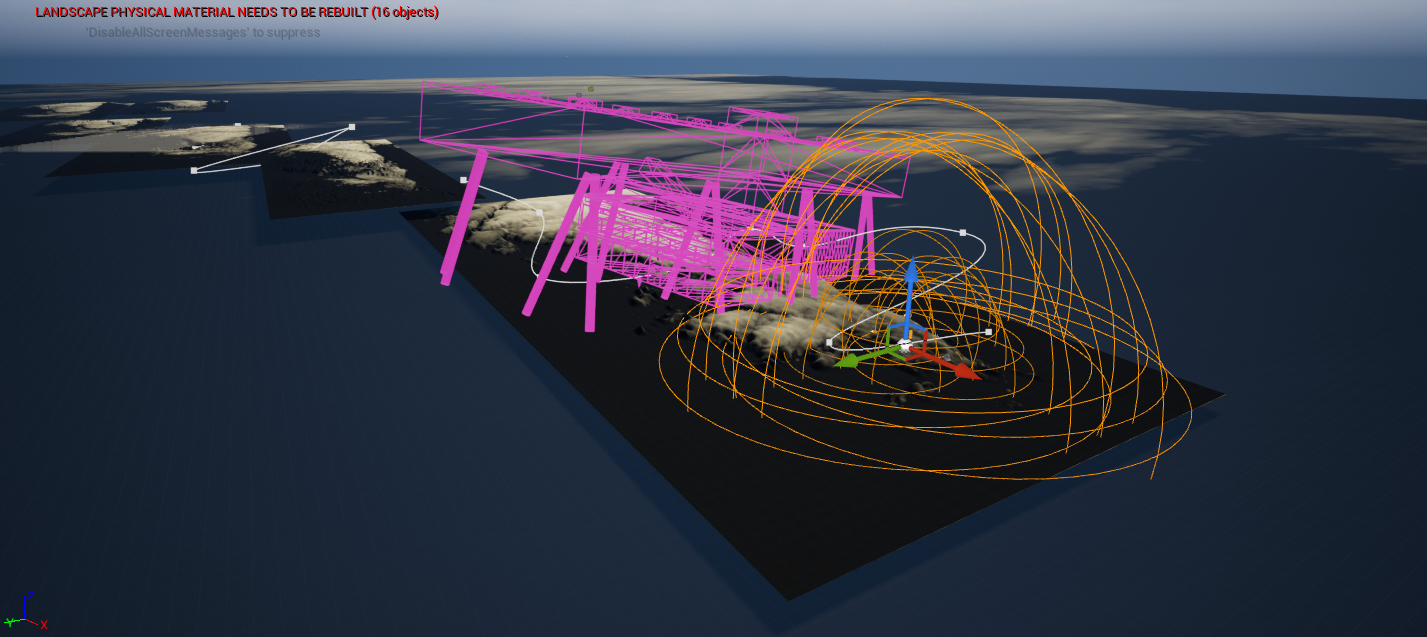
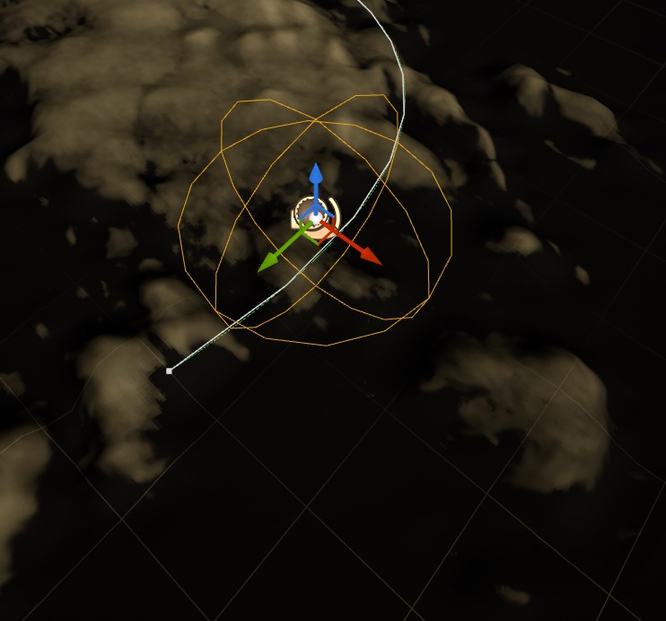
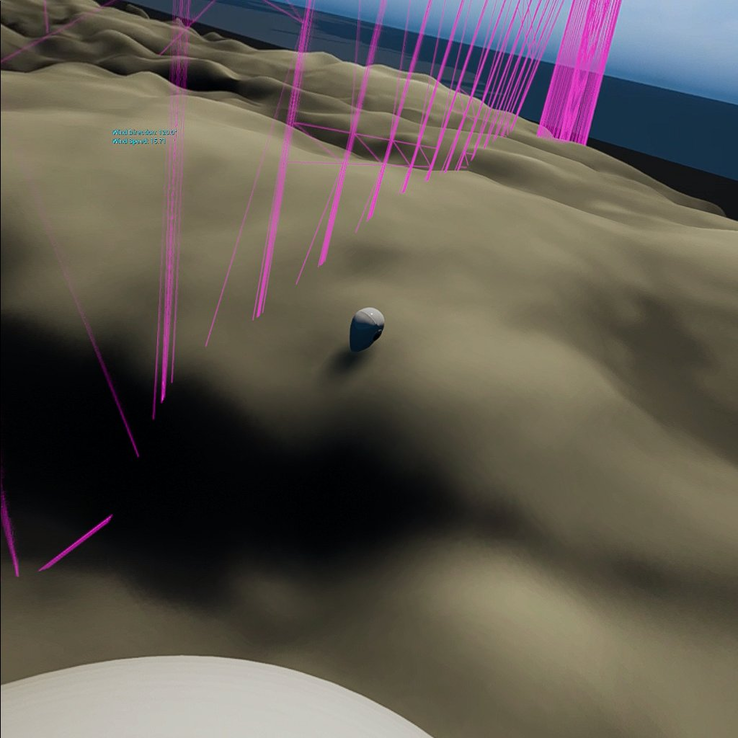
Working in 3D on a 2D screen is a challenge. At times, we struggled to understand how to shift between the six perspectives of top, bottom, front, back, left, and right. Scale is always relative, but particularly when navigating inside a computer. We would import objects into our environment only to be unable to find them because they were either too small to see or so big we were inside them without knowing it. We initially added mannequins/avatars into our landscape to help us grasp its scale.
When we put on the headset to look at the world we were creating, we couldn’t find the mannequins. But we did see odd artefacts on the landscape and falling through the air. We hadn’t realized that the wind that was blowing our fabric was also affecting the mannequins. Much to our dismay, their bodies had been twisted and contorted by the wind. The work already had an uncanny, dystopian aura to begin with, but with the addition of mutilated bodies it was pushed over the edge into horror—not what we were going for. The mangled bodies did not make it into the final version.
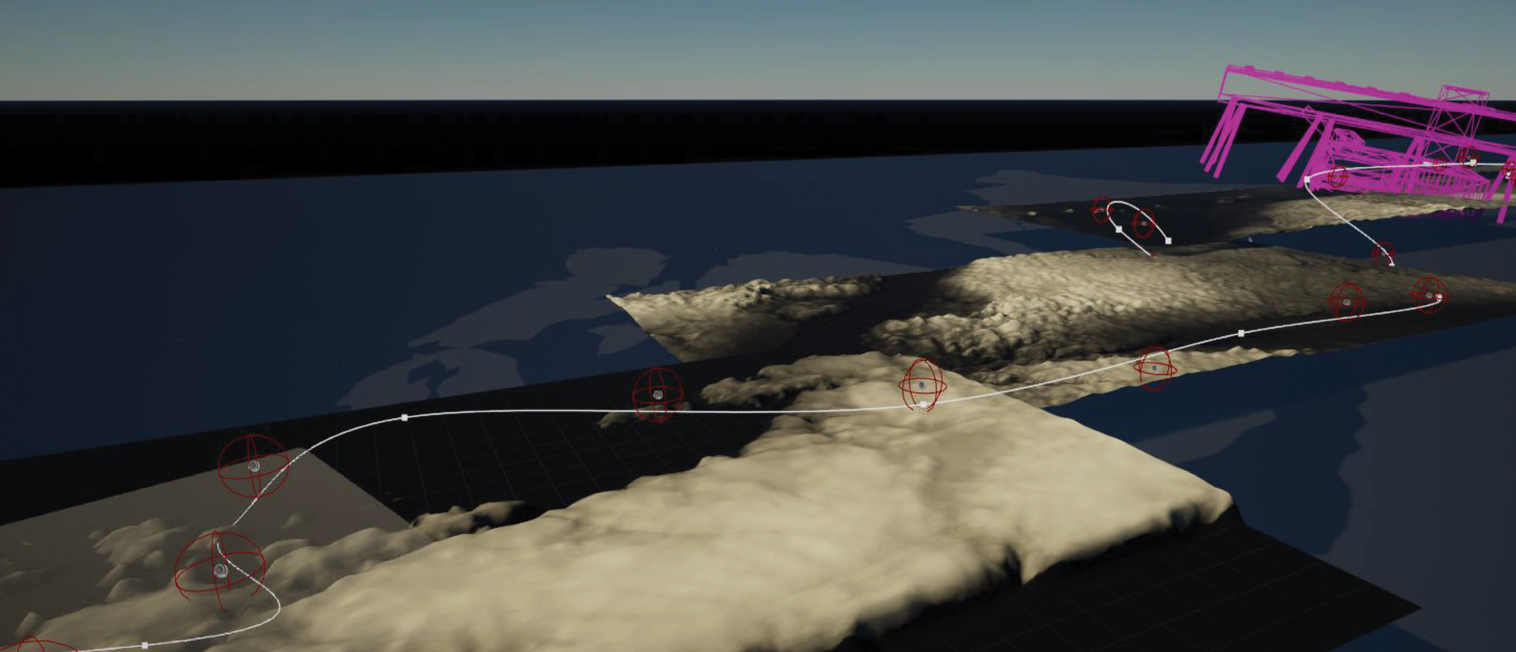
4.4 Landscape
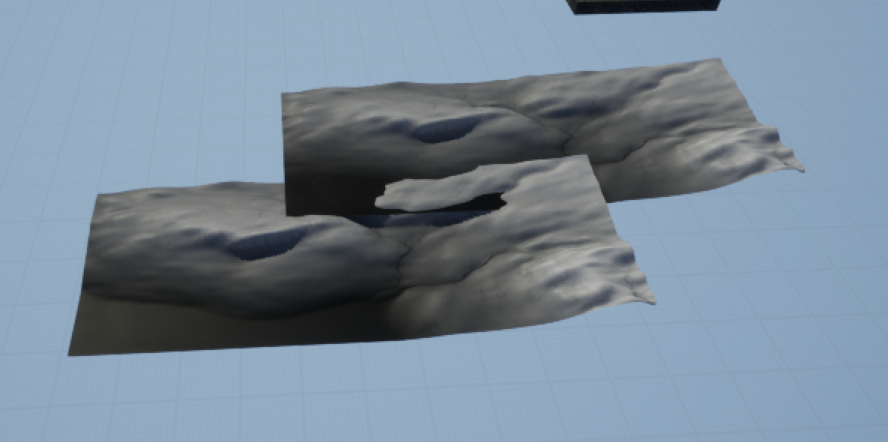
We created a digital environment that specifically draws on the landscape of our vast, relatively empty country using recorded geographic data from the site Open Topography. By capturing height measurements recorded in grayscale images—white representing the highest points on the landscape and black the lowest—we were able to import both the images and the data into the VR game engine, UE. By using the grayscale images, we could recreate chunks of Canadian terrain within the VR world.
We also used three-dimensional models of our institutions to introduce architectural structures. Objects and tools, representative of craft and digital making, were stacked up to create towering sculptural columns that augmented the buildings. And flowing fabric billowing through the landscape became both atmospheric and an analogy for hidden histories, helping to create a curious world for our participants to explore.
In VR we are able to go beyond the surface of the landscape. Rather than arriving at the end of a virtual world, it unfolds in front of you. This unfolding/folding process led us to start building underneath the landscape and inspired the addition of a DNA helix structure which could hint at complexity and roots.
4.5 Sound
Making an experiential soundtrack was crucial for us. A meticulous amalgam of edited sounds and spoken-word recordings was designed to envelope the participant in a space both meditative and inspiring.
While our composer, Ted Carrick, initially employed analog sound arrangements, the core of his 'making' was grounded in learning and crafting with UE5. In a virtual environment, voices and sounds become 3D objects–no mono, no stereo, but an infinite number of speakers. Ted had to visualize the sound as an assemblage of floating elements, which required him to engage in an unfamiliar process of placing sonic components within a digital space. Allowing the various tracks to remain in place when the participant moved their head (and headset) was particularly challenging. Ted noted the understated difficulty of this endeavor: “In an immersive space, it’s really important that the sounds don’t follow you around.”
Some might appreciate the layered score as an echo of the repetitive nature of craft. Meanwhile, others might focus on the thought-provoking wash of voices. Regardless of one’s specific approach, the score acts as an embodied vehicle pushing the participant to 'wander' both physically and mentally through craft in the digital turn.
4.6 Textile & VR
We are not the first to sink within the folds of digital textile. Indeed, other practitioners have expanded on the possibilities of 3D textile and surface rendering (Kanade & Ukita 2012; Smitheram 2015; White et al 2006). In respect to this lyrical essay, our interest lies in understanding the differences between manipulating 'real' fabric and digital cloth, as well as how fabric appears when moving within a 3D space.
We knew that we wanted our VR environment to contain a 3D moving cloth. We learned fabric rendering through watching a UE5 flag tutorial and following precise directions. Design a flag and remove the pole–it all seemed quite straight-forward. Then, it took months to learn how to make a flag, and a couple weeks more to figure out how to remove the pole. We never really managed to remove it.
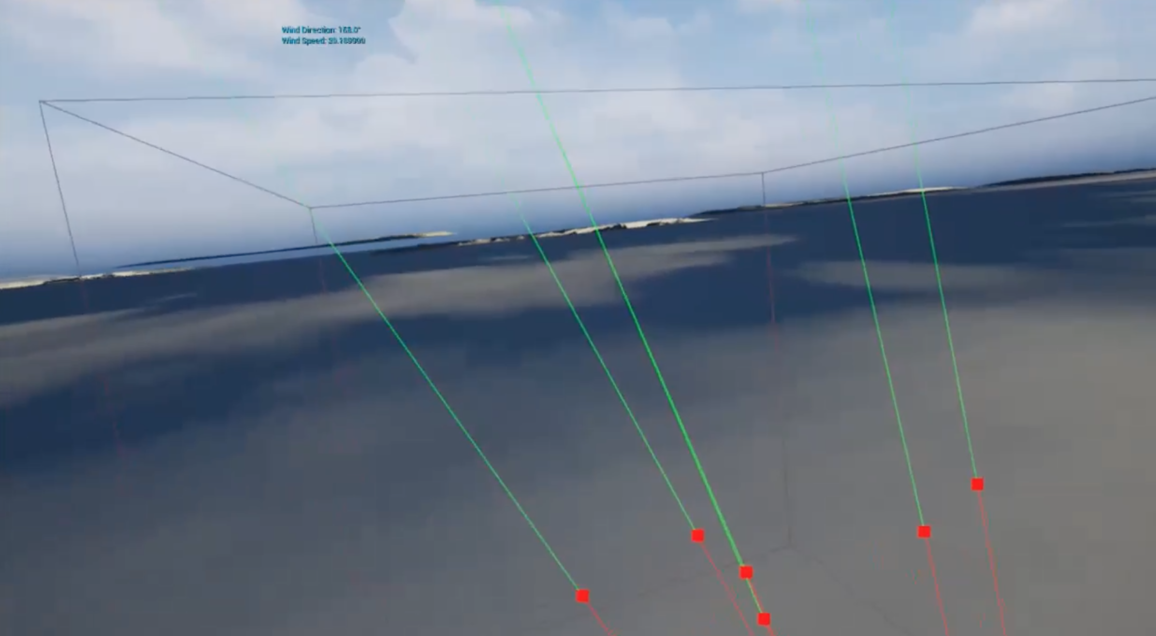
We then placed a 3D rectangle mesh in our world and understood that we needed to 'paint' the fabric to control its drape and stiffness. In order to play with the cloth’s motion, we painted the whole surface of our digital canvas. As a result, the fabric gently floated away. It was lovely but not exactly what we intended. We came up with a few alternatives: painting the middle, painting two corners, or painting various circles of different sizes. Meanwhile, we discovered that a 'wind' tool had to be engaged in order to activate the 3D textile. Specifically, a 'randomized wind' plugin, which provided our digital cloth with a sufficiently realistic rendering.
In 'real life', fabric comes with a ready-made surface, texture, and color—at least most of the time, that is, unless you develop your own. We spent hours and hours trying to find the perfect surface design. There is an endless supply of open-sourced material online, which is fascinating, but finding exactly what you want is unfortunately near impossible.
Another problem arose. Our digital fabric moved in a gentle and sensuous manner, which was an inadvertent result of our overburdened system having a hard time dealing with the processing power required of it. Eventually, Owen, our coder, solved the computing problem, and as a result our fabric began to move at a frenetic pace. There was yet another major learning curve ahead.
Observing the fabric in motion became a sort of calming ritual for us–a place of solace amidst the endless frustrations of the digital learning process. It was even more satisfying and gratifying for us to interact with the folds. In the end, still unfinished, the rendered 3D cloth became a vessel that led us over and through the landscape—and then underneath.
4.7 Protocols & Repetition
We wrote, rewrote, and faithfully consulted our protocols every time we worked in VR. Sequential memory is the key to digital literacy and protocols are the key to sequential memory. Missing one little step meant hours of tracking down a roadblock.
Even though the protocols are imperfect tools, we have a memory of having to do the same to understand pattern-making. We would learn through thoughtful lists with highly specific steps, following them carefully until we didn’t feel like it anymore. And then comes improvisation, or something closer to creative freedom. There is no such thing as linear learning… How to unlearn or draw upon our knowledge to learn again?
Intuitively implementing a process of figuring out how UE5 works, we wrote down the steps as a kind of protocol. Editing the protocols constantly, they became unfinished learning tools. We developed 'Packaging' (from Slow Guy video) and 'Light & Fog' (from Sensei tutorial video, behind paywall) but one protocol that was really meaningful to our learning experience was Moving Fabric (from the Flag video).


Page 5 Ironing Stories
Moving Fabric Protocol
-
Import your mesh as a skeletal mesh (obj.). The mesh/plane needs to have a lot of subdivisions—but not too-too much.
-
Click on the skeletal mesh box when importing. A box will open—that is okay.
-
It should open 3 files in your content browser (physics asset, skeleton, skeletal mesh).
-
Open the skeletal mesh asset—the pink one.
-
Under ‘skeletal mesh’, under ‘asset details’, under ‘material slots’. Add a material to your asset (plane). Enabled ‘two sided’.
-
Under Window, click on ‘clothing’ to add the ‘clothing’ tab to your window. (In the video, do not worry about ‘section selection’.)
-
Still under ‘skeletal mesh’—the pink icon—, select your object + Right click on it. Click on ‘create clothing data’. Click on ‘create’.
-
Right click on your object again. Click on ‘apply clothing data’. Click on the asset that was just created (OD). (It will now compile.)
-
Under ‘window’, select the ‘clothing’ tab.
-
Select the object (LOD maybe?).
-
Click on ‘activate cloth paint’ (tab at the top).
-
You can now switch the various values of your paint brush.
-
Play with paint value—the higher the value, the drapier.
-
Modify the point value to 1000.
-
Specifically for the CDT project: Leave a tiny edge on the side of the plane with no paint. Or paint one big circle in the middle. Or paint 3 tiny dots in the middle. Or do whatever you want.
-
Click on ‘deactivate cloth paint’.
-
When done, drag the plane on your level.
-
Insert ‘directional wind’.
-
Depending on the size of your plane/fabric, you might have to add a few ‘winds’. That is not true! Do not follow!
-
Play with the direction of the wind.
-
We need to add the 'random wind' step.
Zoom Transcript from a session between Lynne and Tricia (07/01/2022)
YouTube Guy—... Nanites! How do they do it? Well, I’m going to talk to you a little bit about how they did it, or at least, how I think they did it in this video, and then, we are going to try and destroy it by 30/90, by spawning the ancient one… It’s going to be awesome! Alright! So, like always, if you don’t see…
LH— Hum… I’m a little worried about this one.
TC—Yeah?
LH—Yeah… Let’s look at another video about Nanites… Nanite Unreal… Let’s understand what that is. Nanite virtualized geometry. OK, so, Nanite is Unreal Engine 5's virtualized geometry system—that’s what we need, a geometry system.
TC—Hum, hum…
LH—... which uses a new internal mesh format and rendering technology to render pixel scale detail and high object counts". I think this is important.
TC—Hum, hum…
LH—"It intelligently does work on only the detail that can be perceived and no more.” Oh! “Nanite's data format is also highly compressed, and supports fine-grained streaming with automatic level of detail.” So, if I understand correctly, like, when I’m in Second Life, what I’m close to renders. And everything in the distance does not render until I move up towards it. I have a feeling that this is what this is saying that Nanite just allows you, that’s why everything can be so complex because they don’t worry about rendering everything. OK, benefits. “Multiple orders of magnitude increase in geometry complexity, higher triangle and object counts than has been possible before in real-time. Frame budgets are no longer constrained by polycounts, draw calls, and mesh memory usage”—I do understand all that. Hum, just stop me if you want to understand anything more. “Now possible to directly import film-quality source arts, such as ZBrushsculpts and photogrammetry scans.” Oh! That’s something I’m exploring later on today. Do you know what that is?
TC—Hum, no, I’m not sure, no!
LH—So, I don’t entirely know because I haven’t done it, but you can take a picture of something and it turns it into three dimensions from extrapolating, I think. I’m not 100% sure but that’s the idea. And, then, OK… There are two ideas, one is, when you have an object you can do a 3d scan of it… I think that might be photogrammetry. Also, my understanding is if you just have a two dimensional thing, somehow you can create a three dimensional thing using photogrammetry. That would be really great if we could…and I will learn how to do that. There’s another program that I read about, I’ll send you the article. I read that article once and I am going to read it again in order to understand because I think that it might be critical to us making this a beautiful piece. So, that’s photogrammetry...use high-poly detailing rather than baking detail into normal map textures. OK, do you understand that?
TC—I mean… I know what baking is now. So, I guess… Instead of baking and putting everything together—remember you gave the pdf example—nanite is not doing this to keep all the details, is that it?
LH—Bingo! It’s like using the Word document rather than the PDF…the level of detail is automatically handled and no longer requires manual setup. Oh, oh! Before, you had to go through all your individual meshes and you had to say ‘this is the level of detail I want’ and, at different places, you had to indicate different levels of detail—it was a real pain in the butt...loss of quality is rare or non-existent, especially with LOD transitions. OK! Although the advantages can be game-changing, there are practical limits that still remain. For example, instance counts, triangles per mesh, output and performance should be carefully measured for any combination… OK! How is a Nanite mesh different then a Static mesh? And then, what we have to figure out is, maybe find this other video that we just started with, and see if a nanite mesh can become a skeletal mesh because he just said ‘there’s this trick’. So, a Nanite mesh is still essentially a triangle mesh at its core with a lot of level of detail and compression applied to its data. On top of that, Nanite uses an entirely new system for rendering that data format in an extremely efficient way. All that is required for a static mesh to take advantage of Nanite is a flag to enable it. Oh! So, a static mesh can become a nanite mesh? Authoring content for Nanite is no different than traditional meshes except that Nanite can… Move the camera close enough and Nanite will draw the original source triangles that were imported. Nanite meshes support multiple UVs and vertex colors. They use different shading, they can be swapped dynamically, they don't require any process to bake down materials. Virtual textures are not required to be used with Nanite—what are Virtual Textures? Virtual Textures are an orthogonal Unreal Engine feature with similar goals for texture data that Nanite achieves with mesh data. Wow, I didn’t know that! Hahaha… Maybe we should learn about that too…
Landscape Protocol using OPEN TOPOGRAPHY
- Go to Open Topography
- Go to Data>Find Data Map
- Use the scroll button and mouse to find an area you want to lasso
- Click on the Select a Region button
- Lasso the area, that will trigger the page to scroll to some tabs below the map
- Choose the Global & Regional DEM[7] tab
- Choose the SRTMGL1 button near the bottom
- New page of the site, scroll down and keep GeoTiff selected for Data Output Formats
- Deselect Generate hillside images from DEMs under Visualization
- Title the job if you want
- Click on the SUBMIT button
- Wait for a download link (can take 30 seconds or more)
- Click download link when it appears
- Save the file to your computer
- Find that file on your computer and double-click it to unpack the zipped file
- Next step you need the open source app called QGIS, click on the file and select
- Open with…and choose QGIS
- In QGIS select Project>Import/Export>Export map to image (there is a shortcut for this but I haven’t found it yet)
- Click save
- Name your file and where you want to save it too, choose the PNG format (default)
- Open the newly saved file in Photoshop
- Change the mode by going to Image>Mode>Grayscale
- Repeat changing the mode by going to Image>Mode>16 bit
- Crop if desired
- Save the image
- Open an UE5 project
- Click on the little landscape icon in the top toolbar (it is part of a group of icons in the middle of the toolbar)
- On the left hand side of the UE interface there is a panel called new landscape, choose Import from File and click the three dots to bring up a browser
- Navigate to the png file you just saved in Photoshop
- Click the Import button at the bottom of the New Landscape panel
- On the right side of the interface find the landscape in the World Outliner and select it
- In the Details panel under the World Outliner use the arrow to open Transform if it does not show position coordinates
- Change the Z scale coordinate to something like 5
- Add a material