In 2005, I visited an art gallery in Helsinki where I started talking to the gallery host, an Icelandic guy, who happened to be one of the artists displaying work at the gallery: An acoustic guitar with a loudspeaker mounted in the sound hole, and a pick-up, normally used on electrical guitars. There was also a video showing this instrument in use: The same guy playing the instrument as a normal guitar, but when he plucked a string, the sound of it was sustained like a long, continuous note, until he dampened the string with his hand. The gallery host’s name was Halldor Ulfarsson and the instrument he had developed was an early version of the Halldorophone (Úlfarsson 2018). The instrument has since then been developed further and taken the form of a cello-like instrument. The latest version has 8 strings. Today Halldor has built all instruments himself and the still ongoing development has resulted in numerous papers.
As a former percussionist, I have spent thousands of hours in the practice room rehearsing other’s compositions for performing in front of an audience. From time to time I have bumped into technical challenges that needed to be solved for a particular piece. After a while you develop strategies for how to move forward for solving these problems. Sometimes you find technical exercises or etudes made by others, and sometimes you need to develop these solutions
yourself. These technical difficulties can often be very specific for a certain piece, but when creating exercises myself I would also expand them to also include the reversed sticking, or other logical combinations that was related to the original problem, to make sure both hands would ”learn the same”, and just in case I might need the other combinations later. I was creating rehearsal platforms for solving present and future problems.
I had the same approach with the development of the FLAPIBox: To create a platform for augmenting as many instruments as possible with one single device.
Digital Lutherie
Digital lutherie is a term that was coined by Sergi Jord´a in a paper in 2004, and has been elaborated on by researchers in many publications later, mostly within the community of New Interfaces for Musical Expression (NIME). A definition on the term is as follows:
”Digital lutherie is a sub-domain of digital craft focused on creating digital musical
instruments: high-performance devices for musical expression.” (Renney 2022)
Common for most of the articles on the subject is that they all reference the following quote from Perry R. Cooks paper from 2001: ”Principles for Designing Computer Music Controllers”:
”Musical interface construction proceeds as more art than science, and possibly this is the only way that it can be done.” (Cook 2001)
Sergi Jorda follow up on Cook:
”Digital lutherie is in many senses, very similar to music creation. It involves a great deal of possible and different know- how, (. . . ) digital lutherie should not be considered as a science, no more than music, but as a sort of craftsmanship, that may sometimes produce - in very exceptional cases- a work of art; no less than music.” (Jordà 2004)
Dudas refers to composing an ”instrument”, when designing an interactive musical system (Dudas 2010).
Many of the related projects I have studied are motivated by performers wanting to enhance their instrument and many of these performers are improvisers. Most comparable projects developed are only able to enhance one single instrument, the developer’s instrument. My motivation for developing new technology is from a composer’s view. I’m not enhancing my instrument for extended timbral possibilities as a performer. I’m creating a platform, or device, that will fit any instrument and can be commonly used by myself and others, both performers and composers. The goal is that it should be as reliable, or controllable as any already known instruments, making it easy to integrate in compositions.

Module Based Thranophone:
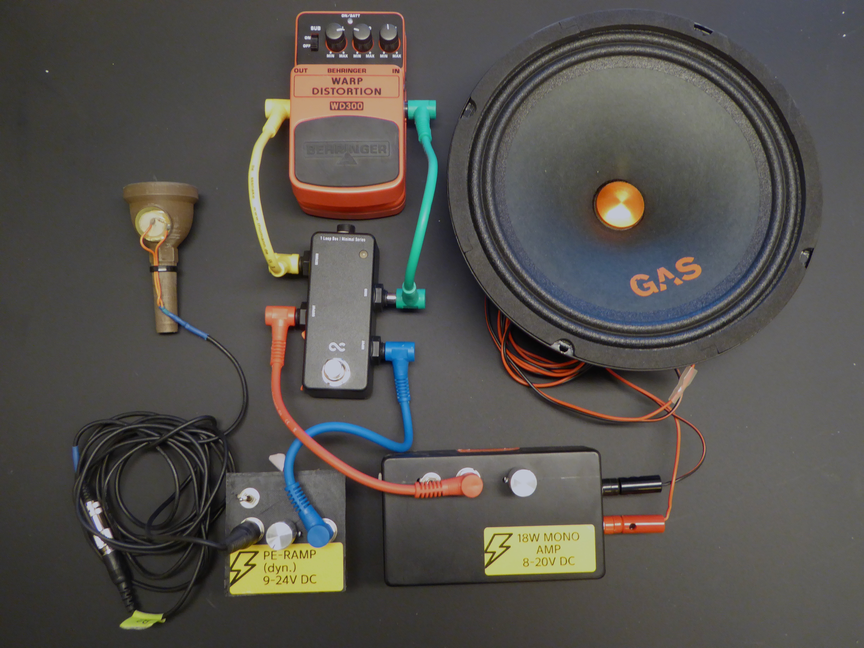
When starting my PhD project in 2021, I started looking at the Thranophone-project again with the aim to learn the electronic-part better, and to create a more reliable device. To better understand the signal path, I separated all the components and built individual modules that could be connected by instrument cables. Quite similar to how a guitarist’s effect rig would look like. The microphone is connected to a pre-amplifier with a gain control. The microphone you see on the picture is a piezo-disc glued to a customised, 3D-printed euphonium mouthpiece. The output from the preamplifier is connected to a power-amplifier via an effect-loop-switch. The loudspeaker has a volume control and a loudspeaker is connected. Any type of effect module can be connected to the loop-switch, which can be turned on or off by the built in button. The effect module shown on the picture is a generic distortion pedal representing any type of effect. All modules run separately on power adapters or batteries. This modular setup proved to be very flexible and I could easily test different modules. Even though the setup was a bit bulky it worked as intended and I soon realised that instead of effect modules, I could connect a computer, which opened up a whole new world of possibilities, either using a DAW like Ableton LIVE, or a programming software like Max/MSP, PureData or SuperCollider for sound processing. Adding a sound card to the computer, I could also leave out both the loop-switch and the pre-amplifier, making the setup more simple. And a more simple setup means less things that can go wrong.

Breadboard Prototype:
I started looking at options for creating an integrated unit, like the first Thranophone. I believe that an extensive technical setup can sometimes lead the attention away from the performer and hence the music piece itself. Making an integrated unit would, in my opinion, hide the complexity of the technical setup for the audience and focus the attention towards the music. The breadboard prototype is based around the Raspberry Pi 4 mini computer that run either RNBO by Max for sound processing. The software is controlled by buttons and potentiometers, connected to the Raspberry Pi via GPIO pins. The Raspberry Pi has only digital GPIO-pins, meaning that without extra hardware you can only connect binary switches. For using Analogue potentiometers you need either a micro controller or a Digital-To-Analogue converter, or you can use digital rotary encoders. Either way, you need extra programming code in a different language to make these work. On the large breadboard you see both a analogue potentiometers setup and a digital rotary encoders setup. Both setups were tested and require a Python code to work with Max/MSP. Further the setup is similar to the Modular prototype: A microphone connected to a pre-amplifier on the small breadboard, running to a generic sound card connected to the Raspberry Pi. The sound output from the computer’s sound card runs to a power amplifier with a loudspeaker connected. Two separate power sources are needed, one for the amplifier and one for the computer.


Prototype #1:
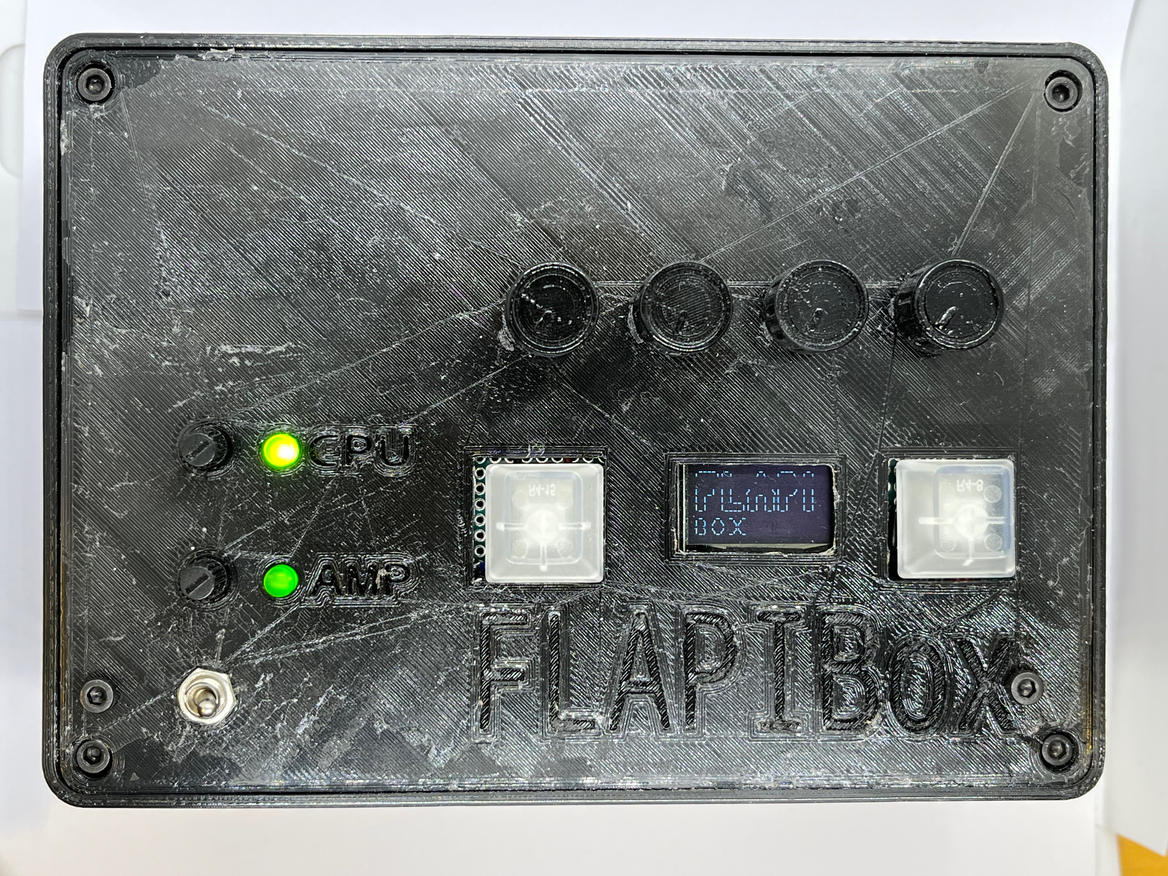
The FLAPIBox prototype #1 is an embedded version of the Breadboard Prototype. Digital Rotary Encoders are controlling the Raspberry Pi. These ones also works as push-buttons. An LCD screen is added for visual feedback. On the front are audio in- and outputs with corresponding input gain and output volume controls. On the backside are the two power inputs. A RNBO by Max-patch is running on the Raspberry Pi, and a Python script is running in the background for handling the rotary encoders and the LCD-screen.


Prototype #2:
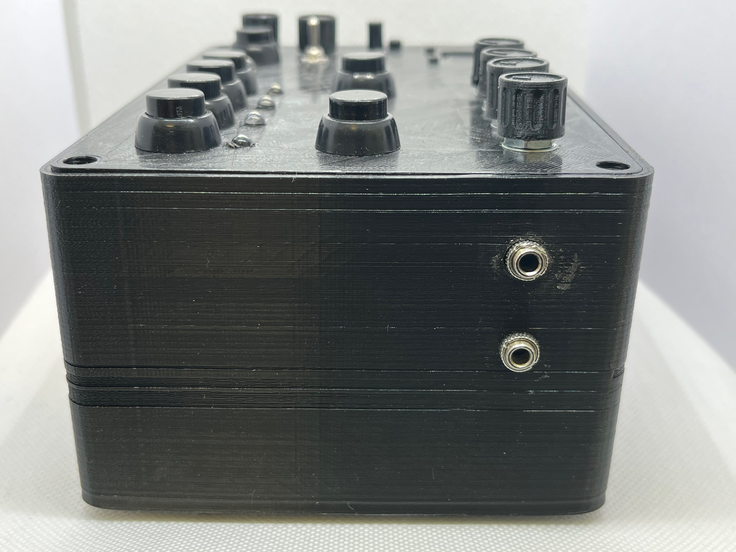
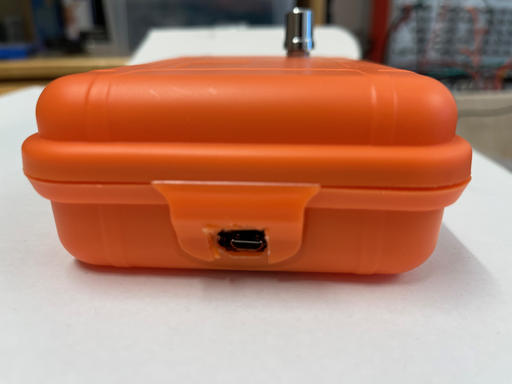
In parallel with the development of Prototype #1, I came across the Bela system, developed by Augmented Instruments Lab in London. The Bela system is tailor made for embedded audio applications due to it’s flexible Integrated Development Environment (IDE). It comes in to sizes, Bela and Bela mini. Both has 8 analogue, and 16 digital GPIO-pins that lets you connect potentiometers, buttons and sensors without any extra components. Another great benefit of the Bela is that it can gain up the input signal 59dB, which make the earlier needed pre-amplifier redundant. The second prototype has only one potentiometer on the top and that’s the volume control. It was later fitted with 3 more for controlling the Bela. This version never got any push buttons. On the left side there is a usb-input that is powering the Bela and also connecting it to the computer for programming. On the front there is two microphone inputs, one for dynamic microphones and piezo discs, and one for electret microphones dependent on the 3,3 volt power from the Bela. There is also a USB-input for powering the amplifier, and a loudspeaker output. The Bela is made programmable in multiple languages via the IDE. PureData is one of these and being the predecessor of Max/MSP, a migration was manageable. PureData is open source, free and platform independent.

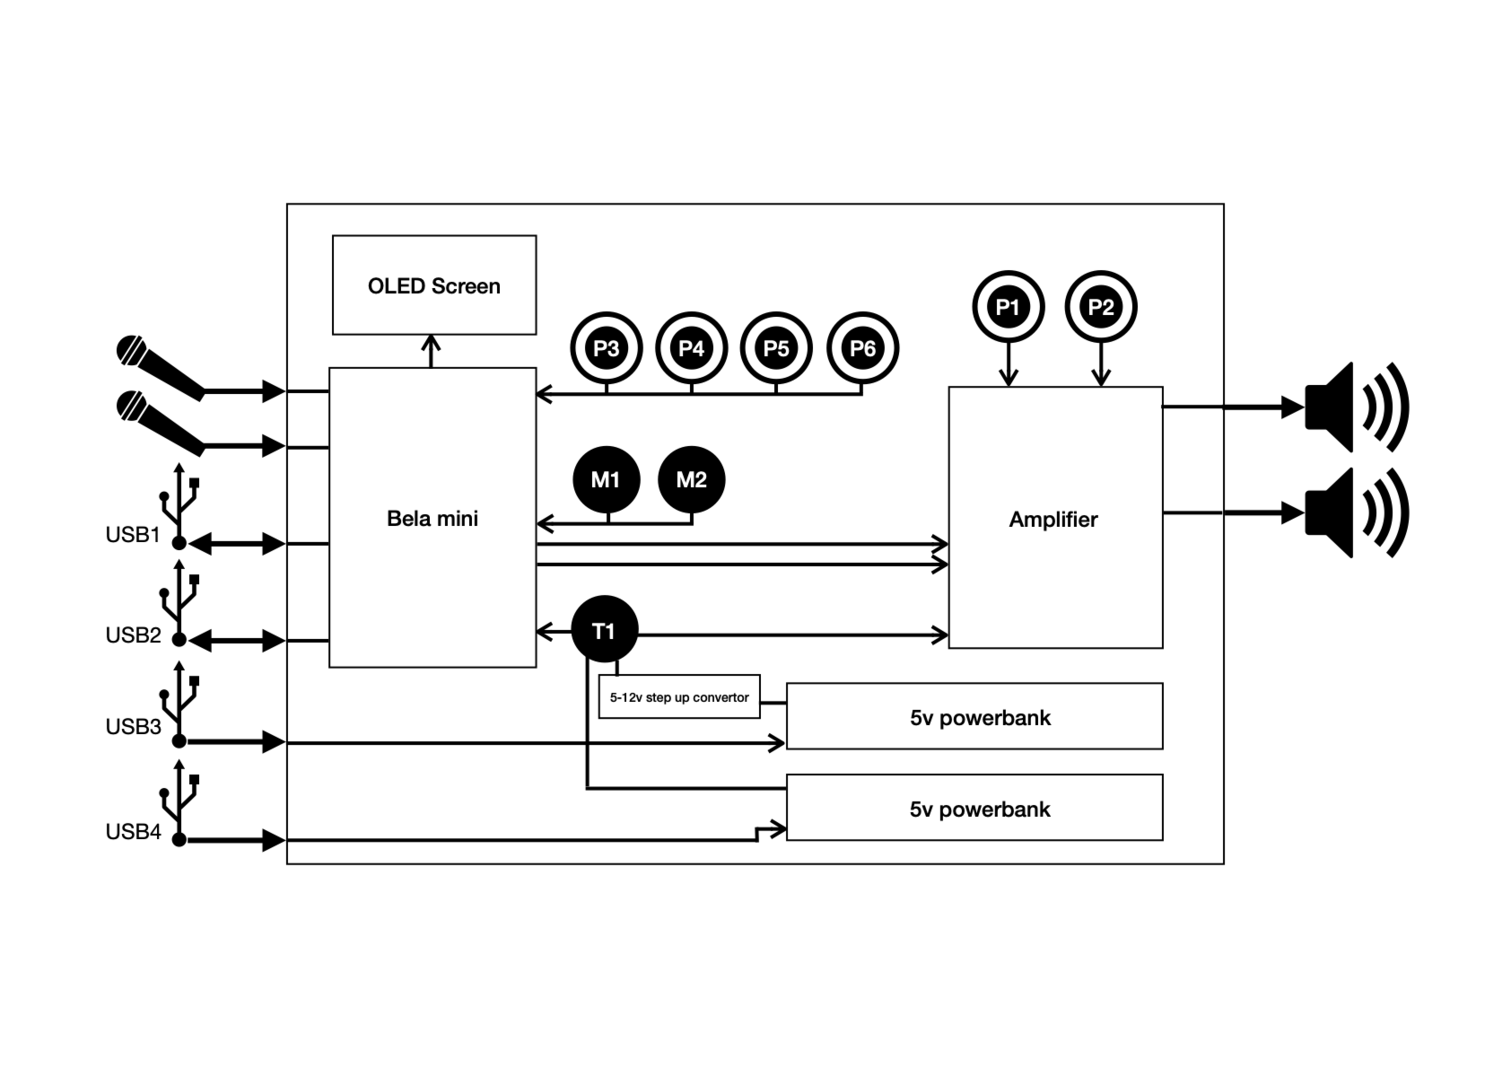


FLAPIBox 2024: